Showing posts with label sanding. Show all posts

Tuesday, June 19, 2018

Mermazing Waves


Today's design team project is a 5 x 7 size card with Lemon Shortbread digital stamps and uses Mermaid Waving along with alot of die cuts and even some dry embossing!

I will also be entering her @ Di's Digi Challenge for "Summer Fun", @ Allsorts Challenge for "Use at Least 2 Dies", @ Dragonfly Dreams for "Anything Goes", @ Crafting From the Heart for "Anything Goes" and @ My Creative Scoop for "Color Inspiration Link Up #35".


I first colored her up with my Spectrum Noir markers and then did some layering over top with colored pencils. I highlighted her jewelry with a sparkly gel pen and added some shimmer over her tail and hair with a Wink of Stella clear marker.


I used a wave embossing folder on two different colors of jade cardstock, sanded it and then fussy cut around the edges. I die cut all the tropical plants from Spellbinders to resemble under the sea plants to coordinate with the beautiful patterned paper I found in my stash and layered everything on.


Until next time~


Sunday, May 27, 2018

My Spring Coffee Lover's Blog Hop Entry #1


Today's card with Craftin' Desert Divas is my first project submission for the Spring/Summer Coffee Lover's Blog Hop. 


This Chibi Coffee digi stamp is part of the new coffee collection over at CDD. I colored it up using colored pencils with clear Spectrum Noir Glitter pen over the top.


The background was embossed and sanded then splashed with FSJ Silver Silk. I added a few layers for texture and heat embossed the "Hi!" sentiment from the Say It Big stamp set. Topped it off with a few teal sequins from the Emerald Isle Sequin pack and I was done!


That's it for me today -please consider joining us for and playing along with the Coffee Lover's Blog Hop~


Tuesday, May 1, 2018

Go Ahead - Make a Splash!


Can you believe that it's May 1st already? And it's finally beginning to feel like spring where I live -thank goodness! Today's design team project was made using the "embossing resist technique" for the Mix It Up Challenge Blog

I took my embossing fluid ink pad directly to the paper through the stencil that I had taped down over my white A2 card base...after gently pulling the stencil up, I immediately sprinkled the clear embossing powder over top and then heat set it.


Over top of the clear embossing, I blended 3 different Distress Ink Colors then buffed off the clear so that the resist really popped! I colored the digital mermaid stamp using Sharpie and Bic alcohol based markers and cut it out using my Scan N Cut. Then I added the pale blue twine behind the image, splashed on some Sparkle Silk and used foam tape to pop her up. The wave strip is dry embossed and sanded, so this card has a nice variety of textures to it.


Until next time~


Wednesday, April 25, 2018

Sorry For Your Loss


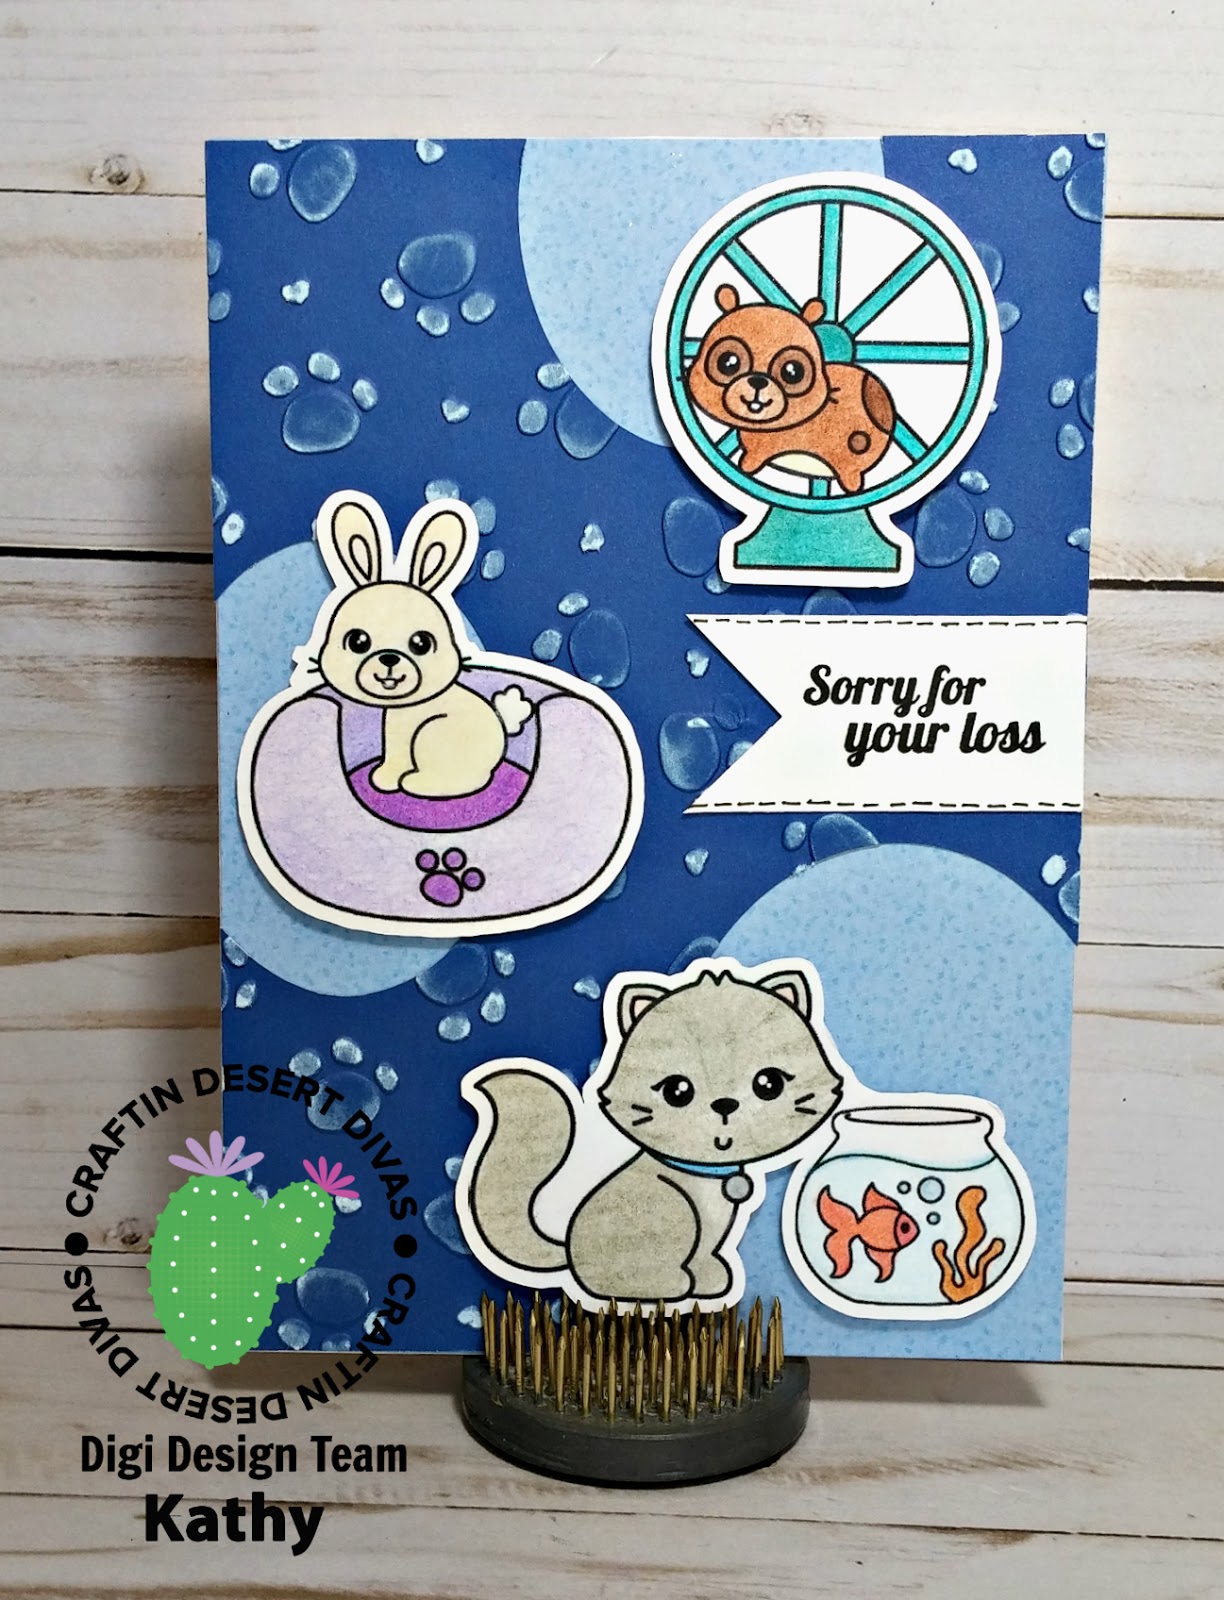
Today's design team project with Craftin' Desert Divas is my second for the April moodboard, but this time I used the egg shapes as my inspiration instead of the pastel colors. I also used the sketch challenge from Your Next Stamp and between the two of them, I came up with this cute pet sympathy card.


The Pet Shop images are from a CDD digital set and the sympathy sentiment is from a CDD clear stamp set. I did the coloring using my Chameleon Colored pencils and my Scan N Cut fussy cut all the images for me. Each one is also accented using clear Wink of Stella pen, but sadly the camera didn't really pick up on all that shine and shimmer.


The paw prints are dry embossed using an embossing folder and I then highlighted the raised surface by both sanding and brushing over the top with white ink. I then cut the 3 ovals out using my Creative Memories shape cutter tool and adhered the light blue patterned paper underneath. This card is a 5 x 7 base.


Until next time~


Friday, March 16, 2018

How to Use the Best Glue Ever to Make a Quick and Simple Card


Today's project with ScraPerfect highlights the Best Glue Ever!


I started this project with a top folding A2 white card base and a piece of white cored light lime green cardstock cut to the size of the card front. I ran it through my embossing machine with the folder shown and then sanded the surface to highlight the design.


The Best Glue Ever along with the No Clog Writing Cap made gluing the layers of my card securely together a super simple job. Things with deep texture can be hard to use adhesives like a tape-runner on, but the BGE works fast and with only a tiny amount...so one bottle will last you a really long time!


I stamped the solid flower image in a deep turquoise blue color, cut a square around it and layered it on to matching cardstock. I then used foam tape to adhere it to the card front for added dimension.


The inside sentiment is a sweet one!


I stamped the "hi friend" sentiment right on to the card front with black ink -using the built in banner area the embossing folder provided as part of it's design.


And that's all there is to this quick and simple card! Until next time, happy crafting with ScraPerfect~


Sunday, October 8, 2017

How to Make an Adorable Kitty Birthday Card Using The Best Glue Ever


Hello crafty friends! Today's card is a cute kitty on a 6" x 6" square top-folding white card base. The patterned papers, embossing folder, glitter and the stamp set that I used are all from the Itsy Bitsy shop. The first step after trimming all my paper layers was to run the floral layer through my Amaze machine with the Mums embossing folder -but only partially -meaning that the left side of the piece of paper hung outside of the folder and stayed smooth. I then lightly sanded the paper to remove the color off the very top and give it some definition.


Using the Best Glue Ever to adhere the embossed paper to the other card layers means that I know it will stay stuck and not pop off later...the dimension from the embossing proved to be a challenge for securing until I discovered how well the BGE works!


I also used the Best Glue Ever along with the No Clog Writing Cap to "color" in the white circles on the yellow patterned paper and then turned them a sparkly rose gold using glitter.


To color my images, I used Distress Inks as water colors...tapping the ink pad onto an acrylic block and picking up the color with a water brush. I just kept layering colors until I got the look I wanted. I then fussy cut out the party accessories and added them to the kitty using mini glue dots. The square kitty panel and the sentiment panel were adhered using mini foam dots for added height.


Here you can get an up close look at how using the sanding block in the first step really pops the embossed dimension up off the patterned paper. This works really well with white cored and white backed papers.


I also went back and added glitter to the pile of gifts once the water color on them was all dry.


Inside I used up some paper scraps and did some quick stamping and coloring. This card is now ready to be given to my niece for her 16th birthday coming up after this weekend.


Until next time, happy crafting with ScraPerfect and the Best Glue Ever! 


Monday, August 21, 2017

Sweet Succulent Birthday Card

Today's card was made using sketch #226 from Atlantic Hearts Sketch Challenge and is my second  Design Team creation for them! I will also be entering @ the heARTful stamping challenge for "Anything Goes + a Stamp" and @ 613 Avenue Create for "Anything Goes w/option of Shabby Chic".


This card was made on an A2 white card base and I used patterned paper from Basic Gray, stamp sets from Close To My Heart and Stampin' Up! + Tuxedo Black ink.


Using circle punches in two different sizes, I punched the smaller circle for my sentiment in white and the larger from a blue scrap of patterned paper.


Next, I stamped the Succulents in black ink and colored them using water color pencils and my Dove blender....and I am really lucky that the ink didn't run, because I grabbed the one I usually only use for colored pencils and alcohol markers by mistake, instead of the Archival one I use with water mediums, lol -oops! I also sanded the edges of the blue circle before layering them and then fussy cut the succulents out. 


The banner was stamped 2 times on the creamy tan patterned paper, fussy cut out and tucked under the circle layers on the card front according to the sketch. 


For added sparkle, I colored over all three of the Succulents with the Wink of Stella pen before popping them up on the card front using foam pop dots. The sequins from CTMH came with mini glue dots already on the back of them -so handy! I then stamped the small succulent behind the Birthday Wishes from SU! in a light gray ink -I think this added such a classy touch!


Inside I made use of the rest of that left over patterned paper, stamped the sentiment in black and the large succulent in gray in the foreground. This card will be going out in the mail to my Dad for his birthday in October.


Until next time...