Today's AHSC DT contribution card was made using the sketch from Atlantic Hearts and the inspiration from Cupcake Inspirations. It will also be entered @ International Art & Soul for "Autumn Colors", @ Dare 2 B Artsy for "Gratitude" and @ Come and Get It for "Thank You/ Thankful".


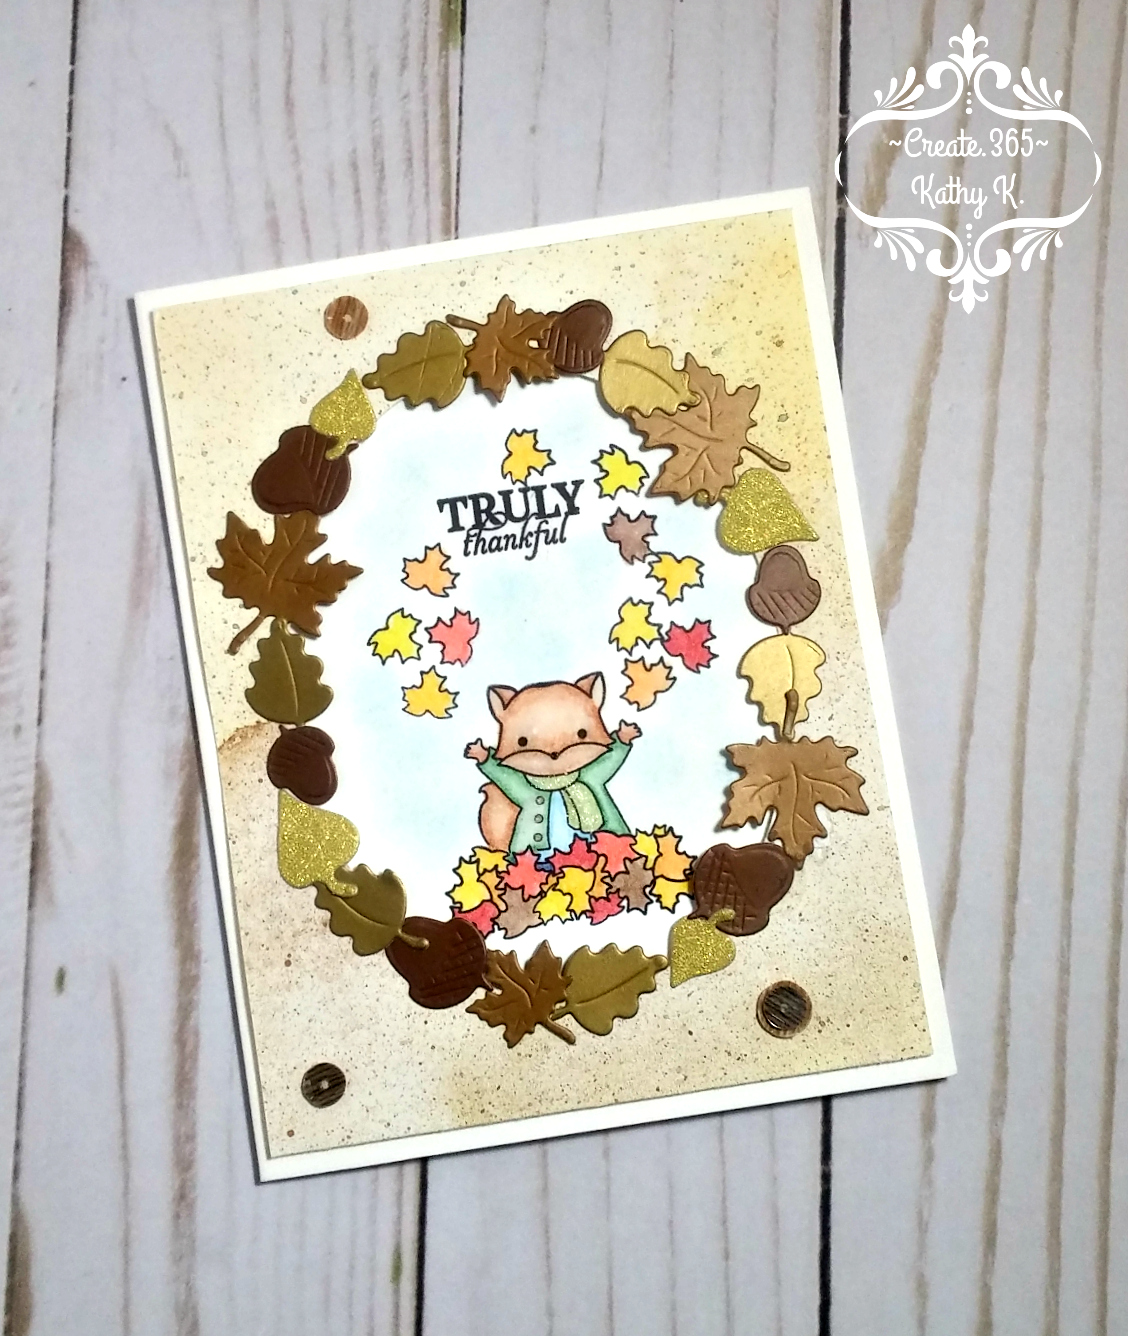
The first step was cutting an A2 side folding vertical card from white Bristol cardstock, picking out a patterned paper from my stash and finding scraps of metallic cardstocks that would fit my small diecuts.

Once they were all cut out, I laid them out exactly the way I wanted them to be around the oval that I cut into the front of the patterned paper layer for the card front. I then used a little trick that I had learned from a Jennifer McGuire video to use Press N Seal to pick up all the pieces and hold them in their places...I just laid it right over the top of the diecut pieces, pressed down and then gently pealed it back -being super careful to keep everything intact!

I then flipped it all over to the back -with the sticky side of the plastic wrap facing up -and added glue to the outside of each diecut piece so that it would adhere to the outside of the oval frame in the patterned paper later. I let it sit for several minutes to give the glue a chance to set up and get tacky -you'll know it's ready when it changes from that white color to more of a clear color. Doing it this way insured that when I was ready to make the transfer to the patterned paper it would grab that instead of just sticking fast to the Press N Seal.

The next step was to carefully lay the plastic wrap holding the diecuts back down over the oval -this is fairly easy to do since you can see through the Press N Seal pretty well. Carefully peel back and press down the dies to make sure they are sticking well and that part is done!

All the stamping and coloring was done directly on the card front where it would peak through the oval window in the patterned paper. To get this just right, I had lightly traced inside the oval using a pencil before I glued the diecuts on. Using retired stamps from Stampin' Up! and new stamps from Sugar Pea, I stamped in black archival ink so that I could then color everything in using watercolor pencils and a blender pen.

To build the background, I colored the sky by using a finger tip sponge dauber and light blue distress ink. After it was all sponged on, I then washed over it with a watercolor brush to soften the look.

To finish my design, I adhered the patterned paper layer using foam tape, topped off the fox's scarf with some clear Wink of Stella and adhered the wood grain sequins from Close To My Heart.

On the inside, I used the oval cut out from the front window, stamped my sentiment (retired from TAC) on it using black ink and glued on some leftover diecut leaves.

That's it for me today...until next time~


A beautiful Autumnal card and a full description of how you made it, thank you. Thank you also for taking part in our challenge at IAAS. Hazel x
ReplyDeletethanks for stopping by and for your kind words!
DeleteWhat a lovely card. Love this neat idea how to transfer die cuts to the card. It would take a lot of time to adhere each one separately . Thanks for joining us this week at Come and Get It Challenge.
ReplyDeletethank you!
DeleteWhat a sweet autumn card! Thanks so much for sharing with us at Cupcake Inspirations!
ReplyDeleteDebbie
thanks so much!
Delete