Friday, March 30, 2018

Welcome Little Lamb


Today's design team project for Crafting' Desert Divas is my second card for the March MoodBoard Challenge but I will also be entering it @ Pile It On for "Circles &/or Squares", @ The Cutie Pie Challenge for "Spring Cuties" and @ Addicted to Stamps for their photo color challenge.


I used baby boy themed linen patterned paper from Itsy Bitsy, a circle punch, a corner rounder and the Lamb With Baby Digital Stamp from the CDD store.


The inside sentiments are from an older set from Stampin' Up!


I colored the lamb image using Spectrum Noir markers and cut it out using my Scan 'N Cut machine.


Wishing you all a blessed Easter holiday weekend...until next time~


Tuesday, March 27, 2018

New Design Team: Introducing Lemon Shortbread Digital Stamps


Today's design team project is my first time working with Lemon Shortbread digital stamps. I recently accepted a position as a design team member and look forward to sharing Vera's lovely images with you over the next 6 months or so! Every two weeks we run an Anything Goes Challenge, so please have a peek at the Lemon Shortbread blog and consider joining in with us.


I will be entering this easel card in the following challenges...@ Dragonfly Journeys for "Bunnies, Chicks and Ducks, Oh My", @ Cupcake Inspirations  for "Blue, Pink & White color challenge", @ Get Creative Challenges for "Fantasy/Mythological", @ Dream Valley for "Spring Colors" and @ Crafty Cardmakers for "Bunnies, Chicks or Eggs". 


I printed this lovely fairy with bunny on Neenah cardstock and colored her up using watercolor pencils and a blender pen. Die cut her out and glued only the bottom half to the scored and folded front of my A2 sized white card base.

For the inside, I stamped the "happy spring" sentiment and die cut it along with the blue glitter cardstock to make the "stopper" for the easel. 


I used clear Wink of Stella on the blue of the sky and to highlight the wings -so pretty in person! The tiny pink flowers I added with mini glue dots and I think they make the perfect finishing touch.


Until next time ~ happy crafting!


Friday, March 23, 2018

Quick and Easy Easter Blessings


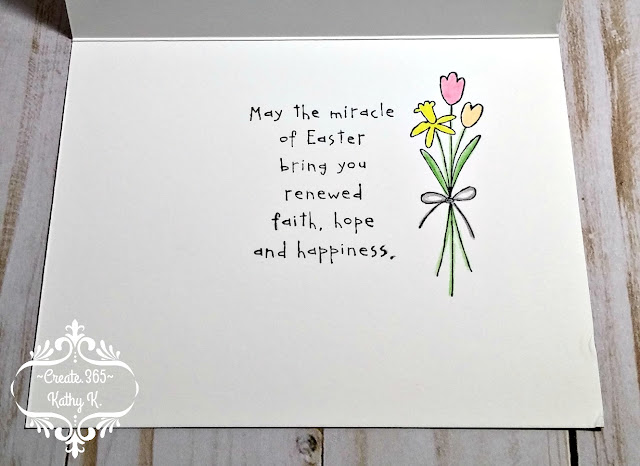
Today's card is one of the projects I designed for the group at the library to make last week and uses a retired stamp set from Stampin' Up that is over 10 years old! I will be entering it in the following challenges @ Ellibelle's Crafty Wednesday Challenge for "All Creatures Great and Small", @ Moving Along With The Times for "Easter", @ Cute Card Thursday for "Easter", @ STAMPlorations for "About Spring and Faith", and @ Brown Sugar for "Spring or Easter". 


I used an embossing folder on the mint green paper and chose a pretty patterned paper to go with it. The coloring was done with colored pencils.


I used a large circle punch to cut out the main image and popped it up with pop dots for dimension. The sequins were attached with mini glue dots, making this a quick and easy card!


 I am soooo ready for spring and this 14" of new snow to disappear, lol! Until next time~


Wednesday, March 21, 2018

Happy St Patty's Day (a little late)


Today's design team project for Craftin' Desert Divas is a little late for the actual St Patty's Day holiday, but I just couldn't resist this "Rainbow's End" digi stamp set! I also used the sketch from Try Stampin' On Tuesday as my inspiration -I just turned it horizontally and made it a 5 x 7 card -along with using their theme of "Green".


I layered the rainbow behind the leprechaun before printing and colored him in with Chameleon colored pencils. I then die cut him out and layered him on green glitter paper. I splashed on some Sparkle Silk from FSJ and accented him with Emerald Isle Sequins


I blended the Lucky Clover Distress Ink behind the sentiment on the inside...this is the same ink I used on the plaid stencil pattern that I repeated across the front of the card. The hand cut banner from the gold glitter paper made the perfect final touch to complete the sketch image.


Until next time~


Monday, March 19, 2018

Mermaid Kisses


Today's card is a design team project for Atlantic Hearts for this week's sketch challenge. I will also be entering it @ Creatilicious Challenges for "Anything Goes w/ Optional Birthday", @ Card Mania Challenges for "Embossing", @ heARTful Stamping for "Anything Goes + a Stamp", and @ Dare 2B Artsy for "Your Favorite Colors". 


I had so much fun making this card and I think it was both because I used my favorite colors and got to take a new stamp set for a spin, lol. I've wanted this set from Stampin' Up since the first time I saw it! I got it in January and just now got around to using it!

So much fun stuff going on with this...not sure where to start! I used dry embossing and sanding on the blue background. Plus heat embossing to make my own background using clear ink so that it acted as a resist for my distress ink. I blended the two distress ink colors over the die cut seaweed panel and then splashed water on it to give it an underwater feel.


Inside I used a strip of the blue scrap paper from the front of the card, blended the extra ink under the sentiment and then added clear Wink of Stella over the stamped mermaid silhouette. 


I colored the mermaid using Prisma Watercolor Pencils and cut both her and the sentiment out using my Scan N' Cut machine...man, I really love that tool! I also covered the mermaid's tail and her headband with Wink of Stella for shimmer and shine.


That's it for me today...until next time~


Friday, March 16, 2018

How to Use the Best Glue Ever to Make a Quick and Simple Card


Today's project with ScraPerfect highlights the Best Glue Ever!


I started this project with a top folding A2 white card base and a piece of white cored light lime green cardstock cut to the size of the card front. I ran it through my embossing machine with the folder shown and then sanded the surface to highlight the design.


The Best Glue Ever along with the No Clog Writing Cap made gluing the layers of my card securely together a super simple job. Things with deep texture can be hard to use adhesives like a tape-runner on, but the BGE works fast and with only a tiny amount...so one bottle will last you a really long time!


I stamped the solid flower image in a deep turquoise blue color, cut a square around it and layered it on to matching cardstock. I then used foam tape to adhere it to the card front for added dimension.


The inside sentiment is a sweet one!


I stamped the "hi friend" sentiment right on to the card front with black ink -using the built in banner area the embossing folder provided as part of it's design.


And that's all there is to this quick and simple card! Until next time, happy crafting with ScraPerfect~


Wednesday, March 14, 2018

Blooming Bunny


Today's post for Craftin' Desert Divas uses the new digital stamp set called Spring Friends and the new Blooming Tree stencil...both were just released to the CDD shop last Friday!


The flowers were cut using the Crazy Stitched Frames die set -along with the front card layer with the tree on it. The sequins are from Pastel Paradise. The "Get Well" stamp came from the "Say It Big" stamp set but the rest of the sentiment came from an old Stampin' Up set. 


I traced the tree through the stencil with a thick black Pigma pen and then colored it in with Spectrum Noir markers - highlights were done with pencils. The bunny and tulips were colored using Chameleon colored pencils, cut out and popped up using foam tape.


This card went out in Saturday's mail to hopefully brighten someone's day. That's it for me today...until next time~


Friday, March 9, 2018

Black, White and a Pop of Coppery Rose Gold


Today's project is a birthday card that will go out in tomorrow's mail and I was inspired by this month's sketch @ Verve. I am also entering it @ Crafty Hazelnut's Patterned Paper Challenge for March, @ Always Happy Birthday for "Anything Goes: Pattern Paper" @ Tic-Tac-Toe for the bottom horizontal row: "Polka Dots - Die Cuts - Happy" and @ Creative Knockouts for "Die-Cuts/Punches". 


This card is a fun combo of black, white and a coppery rose gold. I've used patterned paper, glitter paper, metallic cardstock, several die cuts, paper flowers, thread and copper embossing powder.


Both front and inside sentiments are from retired Stampin' Up stamp sets. The "Birthday Wishes" on the front was stamped using Versamark and embossed with metallic copper embossing powder.


I custom colored the white paper flower using a Cosmic Copper ink pad and adhered it using a mini copper brad. 


That's it for me today -have a great weekend and until next time~