Showing posts with label pets. Show all posts

Tuesday, May 29, 2018

Lettuce Be Friends...


Today's design team project with Atlantic Hearts was a fun one to make using a brand new stamp set from Gerda Steiner called Wheek, Wheek, Wheek. (If you have ever had Guinea Pigs as pets, you will know what that is all about, lol!!!)


I stamped and watercolored all the images and then cut them out using my Scan N Cut machine...layered the lettuce leaves in a circle image around the piggie and popped some up with mini foam dots.


I used my new Triple Banner punch from Stampin Up! to make the sentiment banner and after stamping the sentiment in Versafine black ink I traced over it using a clear sparkle gel pen. A few sequins added the final perfect touch.


Until next time~


Wednesday, April 25, 2018

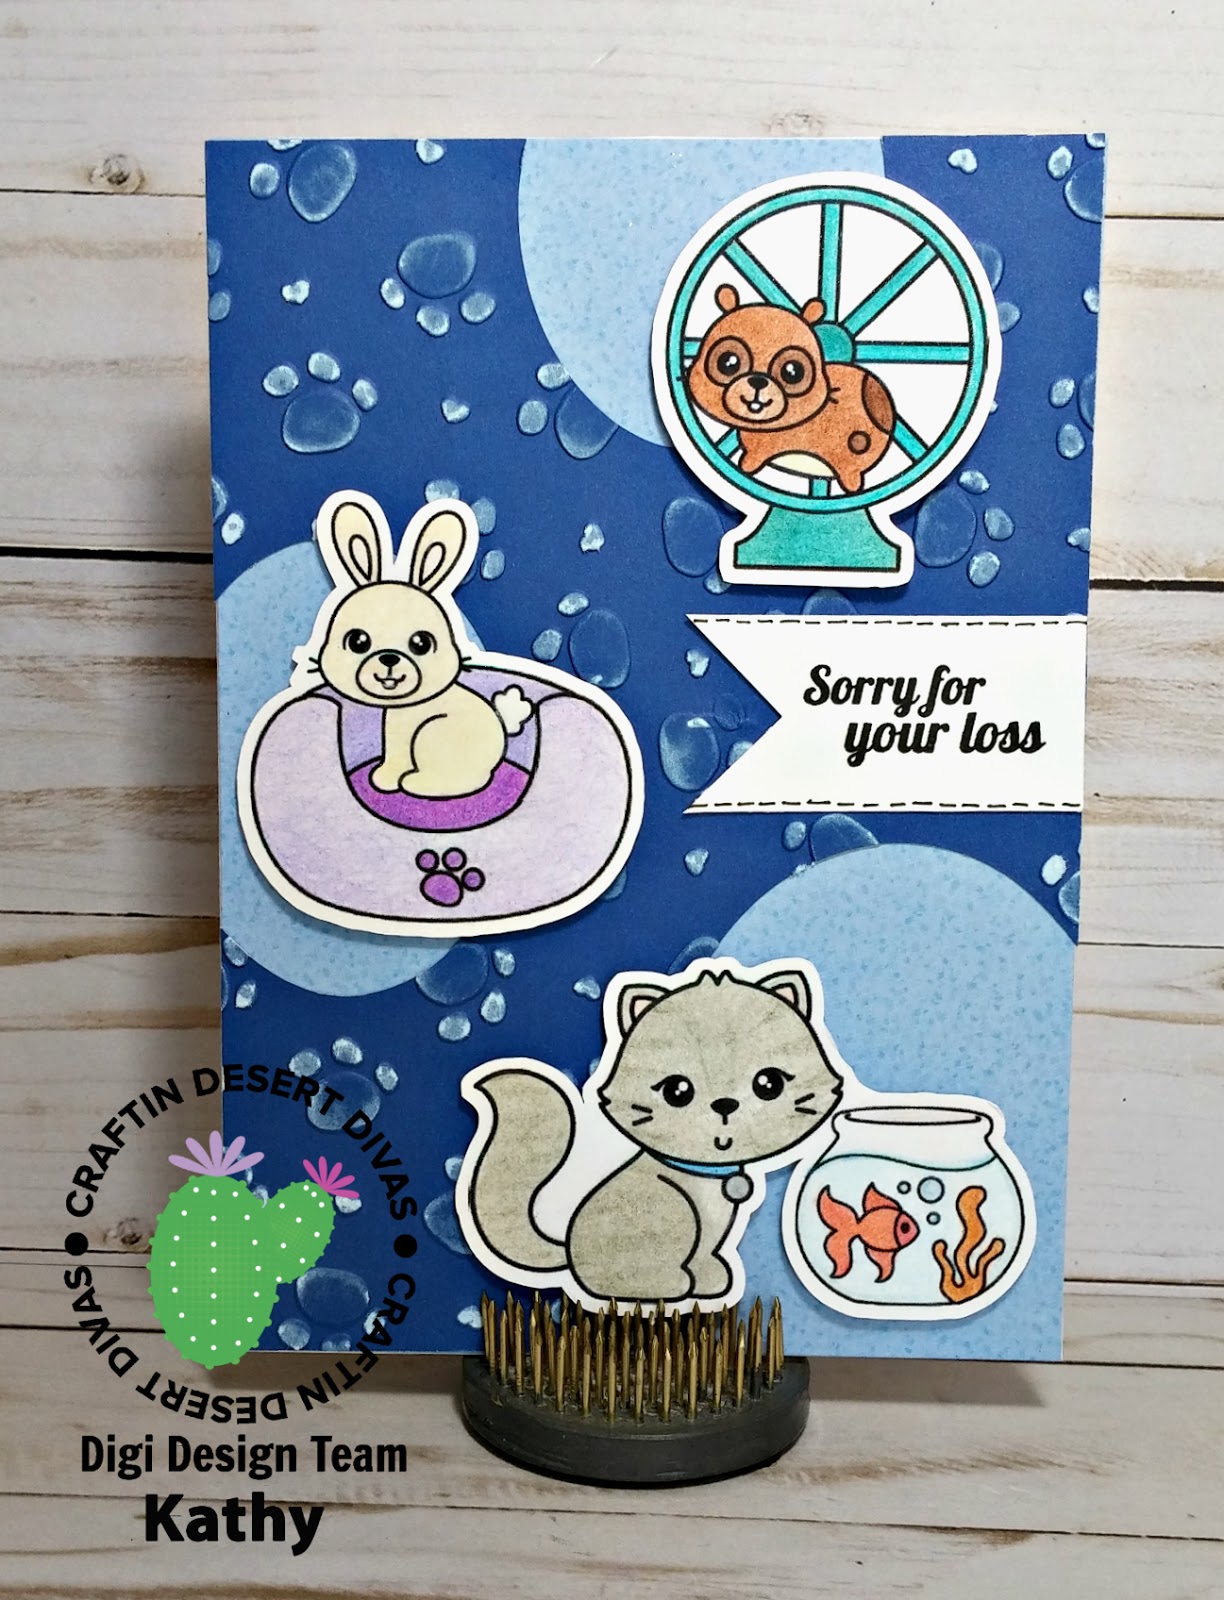
Sorry For Your Loss


Today's design team project with Craftin' Desert Divas is my second for the April moodboard, but this time I used the egg shapes as my inspiration instead of the pastel colors. I also used the sketch challenge from Your Next Stamp and between the two of them, I came up with this cute pet sympathy card.


The Pet Shop images are from a CDD digital set and the sympathy sentiment is from a CDD clear stamp set. I did the coloring using my Chameleon Colored pencils and my Scan N Cut fussy cut all the images for me. Each one is also accented using clear Wink of Stella pen, but sadly the camera didn't really pick up on all that shine and shimmer.


The paw prints are dry embossed using an embossing folder and I then highlighted the raised surface by both sanding and brushing over the top with white ink. I then cut the 3 ovals out using my Creative Memories shape cutter tool and adhered the light blue patterned paper underneath. This card is a 5 x 7 base.


Until next time~


Monday, August 28, 2017

How to Make Your Craft Supplies Stretch Way Beyond the Craft Room!

Today's post for ScraPerfect is not an actual craft project, but rather a reminder that you can use your craft supplies outside of the craft room with very good results! 


As was mentioned on my blog last week, I participate in small animal rescue so there is always a need for me to have a well equipped cage ready to go for a new furry friend. A generous hamster loving friend donated a large cage and supplies to my Rodent Room several weeks ago and I finally gathered everything I needed to set it up. But in the process, I ran into a problem...I often like to secure food bowls on top of a wooden house so that they don't get spilled or covered in bedding...but this time I ran out of my self adhesive velcro rounds. So I tried to use Command brand fixtures instead, only to find out that their adhesive strips would NOT stick to the wood of the house -they just popped right off...UGG -so very frustrating!


This is where the Best Glue Ever came to my rescue! The food bowl already had velcro attached to the bottom of it, so I just needed a way to stick it to the top of the wooden house and not have it slip and slide around. I spread BGE onto the back of the non -cooperative adhesive of the Command strips, positioned the bowl where I wanted it, weighed it down with a marble tile coaster and a larger bowl and walked away to let it set up and dry for several hours.


When I came back to check on it the following morning, everything was firmly attached where I wanted it to be! So the Best Glue Ever really DOES work on so much more than paper...give it a shot and I promise that you too will fall in love with this product! (even if you don't have a Rodent Room in your house or love hamsters like I do, lol)


Until next time, happy crafting with ScraPerfect~


Wednesday, August 23, 2017

A "Wheelie" Cute Hamster Card

Today's card was inspired by sketch #335 at Try Stampin' On Tuesday and will also be entered @ The Paper Players for "CAS: Get Coloring", @ Dragonfly Dreams for "Animals" and @ Addicted to Stamps & More for "Anything Goes".


My son gave me this Hamster stamp set from Lawn Fawn for Christmas and I have been dying to use it. For those of you who may not personally know me, I do volunteer work in small animal rescue and provide both long term and foster homes for gerbils, hamsters and mice. But I have to admit that the full size Syrian Hamsters like the one pictured in this stamp set are by far my favorite! I currently have 3 in my furry family and 2 of them are Black Eyed Creams (one Satin and one Long Haired) that look just like the one I colored.


Using 12 x 12 white, solid aqua and coordinating patterned cardstock from CTMH, I made a top folding A2 white card base. After running the front aqua panel through my machine with the paw print embossing folder, I adhered it on to the card front and used a corner punch to round the bottom corners. 


I stamped the Wheelie sentiment in black ink on an aqua scrap and trimmed a banner to mat with patterned paper.


Using a Spellbinders stitched heart die, I cut a heart from white and stamped the wheel and hearts on it. On a scrap piece I stamped the hamster so that I could fussy cut it out and pop it up. Spectrum Noir markers made the coloring quick and easy.


Adding light gray in the center of the wheel behind the hamster and around the outside of the wheel added a nice depth to the simple image.


The patterned paper strip at the top and the heart were adhered flat with my ATG gun. The hamster and the sentiment banner were popped up with foam dot adhesive. The final touch on the front was to add a tiny sequin heart to the sentiment and sprinkle a tiny bit of glitter over the exposed glue.


Inside I used a stamp from STAMPlorations "Funny Kinda Love" set and more of the tiny hearts like are on the front...this is about as CAS (Clean and Simple) of a design as I can seem to manage to do, lol! This card will get tucked in my hubby's overnight bag on one of his upcoming business trips.


Until next time~

Tuesday, August 8, 2017

How To Make a DIY Up-Cycled Dog Treat Bin

Hi~Kathy here from Create.365 to share with you some crafty goodness and today's project post is -GASP- not a card, lol! With the help of the Best Glue Ever from ScraPerfect I up-cycled an old dog treat container to give it a new lease on life.


I gathered several sheets of tan patterned 12 x 12 papers, inks and a retired Family Dogs stamp set from TAC along with an old paper-board dog bone canister.


Using the Best Glue Ever made this part super easy because it sticks to everything and the front of the original cardboard canister was coated in a waxy layer (can't believe I forgot to take any pics before I covered it -but I was just so eager to get started, lol). I wrapped and trimmed the paper so that the front was covered in one large piece and then seamed the back and the sides.


I traced around the lid and then just kept trimming a little at a time until I got it just right to sit inside the lip on the top. A thin layer of glue was all that was needed to adhere the paper to the plastic!


The tag was punched out using old tag punches and a long retired tag stamp set from SU! and then the layers were attached with a mini silver brad.


And silly me, I decided I wanted to stamp on the top after I had it glued on, so I just laid a thick piece of foam underneath the lid and stamped away with very good results using an old TAC alphabet set for the bold fonted "Treats" and an old CTMH script stamp set for the "dog".


Since one of my dogs is a 12 year old Chocolate Lab (who still acts like a puppy most days!), I colored the dog in her honor with Prismacolor pencils on ivory cardstock, then tore and inked the edges before layering it with a torn patterned paper rectangle on the front.


 All layers were adhered using the Best Glue Ever and I know with the strong hold it will last for many years to come -much to the delight of my dogs who come running every time I shake the treat bin, lol!


Hope you've enjoyed seeing something different from me for a change and until next time...Happy crafting with ScraPerfect~