Showing posts with label watercolor pencils. Show all posts

Friday, June 1, 2018

My Spring Coffee Lover's Blog Hop Entry #2


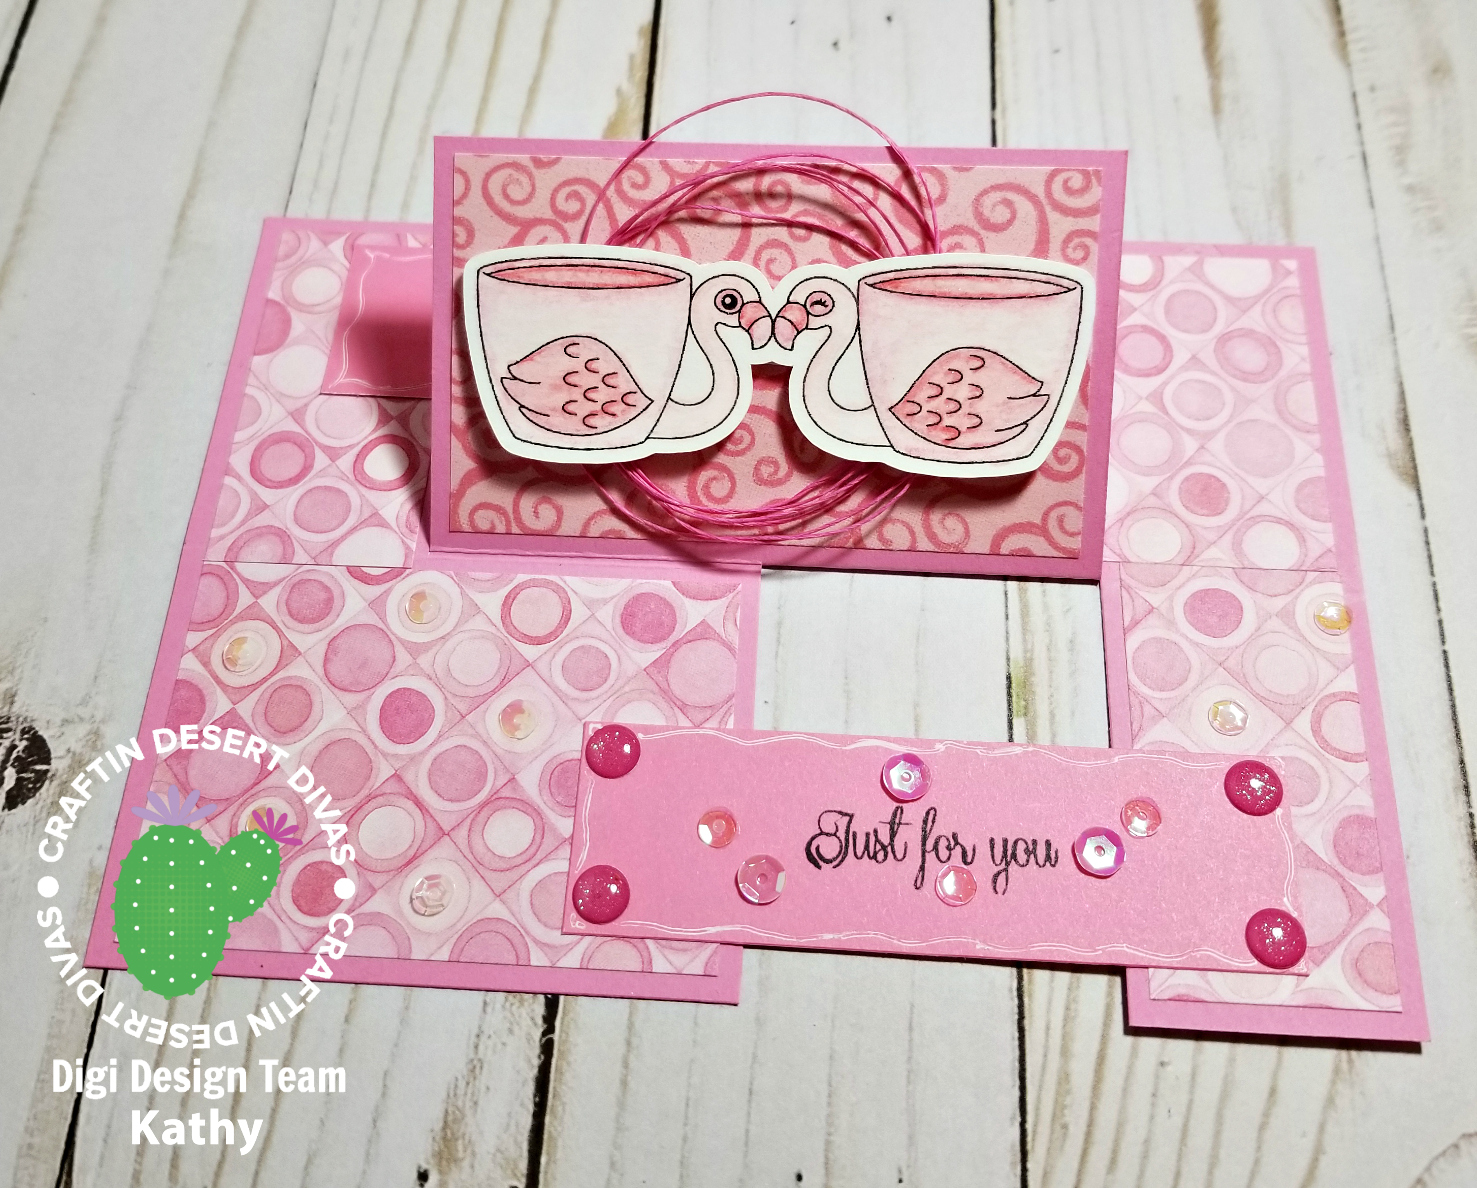
Today's second design team project is with Craftin' Desert Divas and is my first attempt at an "Impossible Card". There was a great tutorial over on Split Coast Stampers this week that finally convinced me to give it a shot, since it folds flat for mailing. The fold is actually much more simple than it looks! 


I will also be submitting this as my second entry over at the Coffee Lover's Blog Hop and joining in once again with the Daily Marker 30 Day Coloring Challenge. 


I used a new digital stamp from the CDD shop called "Flamingo Coffee Mug" along with the sentiment from the "Simply Said" stamp set.


Coloring was done using water color pencils and a water pen. Sequins and sparkle drops made the perfect accents to the pattern papers I found in my stash from Creative Memories.

Have a great weekend ~until next time~


Tuesday, March 27, 2018

New Design Team: Introducing Lemon Shortbread Digital Stamps


Today's design team project is my first time working with Lemon Shortbread digital stamps. I recently accepted a position as a design team member and look forward to sharing Vera's lovely images with you over the next 6 months or so! Every two weeks we run an Anything Goes Challenge, so please have a peek at the Lemon Shortbread blog and consider joining in with us.


I will be entering this easel card in the following challenges...@ Dragonfly Journeys for "Bunnies, Chicks and Ducks, Oh My", @ Cupcake Inspirations  for "Blue, Pink & White color challenge", @ Get Creative Challenges for "Fantasy/Mythological", @ Dream Valley for "Spring Colors" and @ Crafty Cardmakers for "Bunnies, Chicks or Eggs". 


I printed this lovely fairy with bunny on Neenah cardstock and colored her up using watercolor pencils and a blender pen. Die cut her out and glued only the bottom half to the scored and folded front of my A2 sized white card base.

For the inside, I stamped the "happy spring" sentiment and die cut it along with the blue glitter cardstock to make the "stopper" for the easel. 


I used clear Wink of Stella on the blue of the sky and to highlight the wings -so pretty in person! The tiny pink flowers I added with mini glue dots and I think they make the perfect finishing touch.


Until next time ~ happy crafting!


Wednesday, February 28, 2018

How to Take a Coffee Break Using the Best Glue Ever


Today's card for ScraPerfect highlights the Best Glue Ever. Since I also used this sketch in my inspiration, I will also be entering it @ The Paper Players.


In gathering my supplies, I used designer series paper from Stampin' Up, clear stamps from STAMPlorations and of course the Best Glue Ever from ScraPerfect along with the No Clog Writing Cap.


I used the BGE to adhere everything on my card except for the die cut oval on the card front, which I adhered with foam tape for added dimension.


Coloring was done with watercolor pencils and a blender pen,.


I used diecuts from Itsy Bitsy for the oval on the front and the circle inside. The two sentiments are both digital stamps from LaLaLand.


I did add a tiny bit of the purple water color pencil behind the sentiment to help it pop.


Pulling this card all together went pretty fast since I used coordinating  pattern papers.


That's it for me today...until next time~happy crafting with ScraPerfect!


Sunday, February 25, 2018

Hooray for Birthdays!


Today's card is my second design team creation for the February Moodboard Challenge @ Craftin' Desert Divas. I will also be entering it @ Star Stampz for "Make it Girly", @ Cute Card Thursday for "Cute Critters", @ Crafty Catz for "Birthdays" and @ Crazy 4 Challenges for "Add Cake".


The Worn Lipstick Distress Oxide ink is blended through the Sorted Shapes Stencil 2 on the top half and then I used patterned paper on the bottom half. The raccoon is from the Birthday Surprise digi stamp set and the sentiment is from the Birthday Sentiments digi stamp set. I did the coloring with watercolor pencils and a blender pen.


Inside sentiment is from the Say It Big clear stamp set and the pattern was achieved by spraying the stencil with water after working on the front of the card and pressing it on to the card.


You can see it much better in the first picture up above, but I added Glossy Accents to the party hat and clear Wink of Stella to the icing on the cake and the sentiment banner that I hand trimmed. The wrapped ribbon and bow helps to blend the transition to the patterned paper and the pink sequins from the Pastel Paradise pack were the perfect color accent!


Until next time~


Friday, February 23, 2018

Hang in There


Today's card is the first in a series I made using the new February digital release stamp set from Craftin' Desert Divas call "Mouse House".


I also used the new Sorted Shapes 2 Stencil for the blue frame around the main image. Along with the largest die from the Crazy Stitched Frame Dies for the background layer of patterned paper.


The inside sentiment was printed out from the computer and die cut using a banner shape before watercoloring with some blue to help it stand out from the white A2 sized card. All images were colored using watercolor pencils and a blender pen.


That's it for me today ~ have a great weekend!


Tuesday, January 23, 2018

LLama Wish You a Happy Birthday


 For today's design team project for Itsy Bitsy I decided to try something new -stenciling with Gesso over top of plain Burlap = FUN! I wanted this card to have some special dimension to it, so follow along to find out how I accomplished that...
I began by cutting down the 12" x 12" Burlap sheet from the Natural Burlap Stack  to a 6" x 6" square and taping it down to my work surface underneath the Brick Stencil using removable painter's tape. I then used a palette knife to spread the white gesso over the top 3/4's of the panel. I didn't bother to spread it evenly because I wanted the texture to be irregular. I then carefully pulled off the stencil, washed it and set the panel aside to dry while I began work on the rest of the card.


Using thin metal dies from the Banner set, Scalloped Circle set and Stitched Circle set, I cut out 2 of my stamped images from the Llama Birthday Clear Stamp Set and one circle shape from green paper from the Happy Birthday Paper Pad. I then fussy cut out the sombrero hat.


I stamped the images using Black Chalk ink and colored them using Watercolor Pencils and a blender pen on the Llama banner, sombrero and guitar(shown below on the inside of the card). I then popped the hat up using Adhesive Foam Mini Squares and threaded a piece of string that I had pulled from the sheet of burlap under the llama to make it appear as if the llama is wearing the hat hanging down on his back.


I used a black pen to draw the faux stitching along the edges of the banner.


Don't ya just love that cute sentiment inside? Working with these clear stamp sets to make your own sayings is easy because many of the words are separate and you can then just build them to your liking.


The pattern paper on the right side of the card was also from the Happy Birthday Paper Pad. It was hand torn for extra texture and glued down on top of the burlap. After I layered and adhered the circle diecuts, I tied a bow using string pulled from the frayed edges of the burlap and glued that on for the final accent.


 And that's all there is to making a fun and 6" x 6" multi-textured birthday card! Don't forget to head over to the Itsy Bitsy Store to get everything I used here in today's project and happy crafting! 
Until next time~


Sunday, November 19, 2017

Merry Mouse


Today's card is one that the group of cardmakers from my local library will be making at our December gathering. I will be entering it @ heARTful Stamping Challenge for "Anything Goes plus a Stamp", @ Hiding in my Craftroom for "3x Designer Paper", @  2 Crafty Critter Crazies for"Anything Goes -w/ a Critter", and @ Animal Friends Challenge for "Christmas". 

Using two new paper pads that I picked up at AC Moore a few weeks ago and a retired stamp set from the 2016 Stampin' Up! Holiday catalog, I cut the rectangles from 4 different patterns and glued them to the side folding A2 vertical card front leaving a small border of white card showing between them.


 The oval came from white cardstock using my Creative Memories cutter set. The banner is a rectangle cut from green cardstock and then trimmed out using the corner of a square punch.


The cute mouse was stamped in black archival ink and then colored using watercolor pencils, a blender pen and accented with some clear Wink of Stella.


I then tapped on some light blue ink using a sponge dauber to make the sky around the mouse. The sentiment banner was hand cut from white cardstock, stamped in red ink and mounted using mini foam dots.


Using black and white gel pens, I added faux stitching along the edges of the central oval and the green banner. The oval is adhered using foam pop dots to lift it off the card front.


Inside, the greeting and accent stars were simply stamped in Real Red ink.


Until next time~