Thursday, June 15, 2017

How to Make a Quick and Easy Handsome Birthday Card

Hello -Kathy here from Create.365 with a quick and easy handsome card for a man's birthday using ScraPerfect products that I'll be entering @ Always Fun Challenge "For a Male or Dad" and @ Tuesday Throwdown "For the Men" and @ heARTful Stamping for "Masculine + a Stamp".


I shared how to make the rainbow watercolor background in this post here and when I did it originally, I made 4 all at one time...so far, I have used 3 of the 4 on card fronts. This one, I tore the edges to get the square I would use for my focal stamping scene.


I started with a side folding A2 white card front, trimming the turquoise panel so that there was a white border and punched the corners with the southwest corner punch after spattering it with FSJ Silver Silk. Then I glued it onto the card front with a small amount of the Best Glue Ever.


Using dark green and dark brown dye inks, I stamped the pine trees and the moose (retired stamps from TAC) on the panel and adhered it to the bottom of the card front with foam pop dots.


Using clear embossing ink, I stamped the Happy Birthday sentiment to the top right of the watercolored panel and heat embossed it with dark green embossing powder ...of course, the first step in heat embossing for me it to wipe my cardstock with the Perfect Crafting Pouch to eliminate static and the last step is to clean everything off with the Perfect Cleaning Cloth.


Using a thin jute twine, I wrapped the spine of the card several times, tied a bow at the top and secured the knot down with a tiny bit of BGE. Then I used that same glue, the No Clog Writing Cap and the Embellie Gellie wand to adhere the 3 enamel dots exactly where I wanted them to the left of the sentiment.


Inside, I stamped the rest of my sentiment (retired from TAC) and the smallest pine tree. This card is now ready to go out in the mail to one of my brother-in-laws in July.


Until next time, happy crafting with ScraPerfect~


Monday, June 12, 2017

You Light Up My Life!

Today's card was inspired Sketch Challenge #500 over @ Mojo Monday...sadly, this is their last challenge...so I wanted to be sure to participate! I just had gallbladder surgery this past Friday and won't be able to get down the stairs to my stamping desk for a while, so I've got a few cards already done and waiting in the wings to share with you until I get my stitches out in another week.


I'll also be entering this card @ Addicted to Stamping for "Leave a Little Sparkle...", @ Simon Says Stamp for "Masculine", @ Mod Squad Challenge for "Spark It Up" and @ The House That Stamps Built for "Use Washi Tape".


I started this card with a top folding A2 horizontal white card base and spun the sketch on it's side...Trimmed the patterned paper from a DCWV Glitter Mat Stack paper pad according to the sketch and ran the piece of dark blue sparkle paper through my Texture Boutique in a Houndstooth embossing folder from Cuttlebug.


This stamp set is one from Unity Stamp Company and I stamped the sentiment using first and second generation inkings to get the depth of color. (this just means that I stamped once with full ink and then stamped below it right away again without re-inking)


After stamping the light bulb in black ink on gray cardstock, I colored it with Prismacolor pencils and clear Wink of Stella pen for an all over shimmer that the camera sadly just doesn't seem to be able to capture.


 I adhered the blue embossed paper with my ATG gun and added the the two layers of metallic and glitter silver washi tapes down the center. Next up was layering the glittered patterned papers. I also distressed the edges of the focal piece for texture/dimension and adhered it with foam pop dots.


The last step was to add 1 sequin and to splatter the card front with Clear Journey Sparkle Silk from FSJ...but here's where things got a little messy, lol...ya see, I was in a hurry to get finished and spilled some of the Sparkle Silk, sigh. That's why there is a rather large glittery blob on the right side of the card that doesn't belong there! I decided to not re-make the card, because that is the beauty of a hand made card...am I right? It's meant to be perfectly imperfect!!! 


Going with the theme of being perfectly imperfect, the sentiment inside is also flawed because I rocked the stamp as I lifted it and the "!" smeared...oh well...it is what it is, and I am sure my hubby won't even notice when I give it to him, lol! 


Until next time~


Thursday, June 8, 2017

Easy Layered Anniversary Card How To

Hello from Create.365 ~ Kathy here...today's card is my first post for the month of June with ScraPerfect and I have  an easy layered anniversary card to share with you. This uses a technique that I always admire, but often forget to utilize. So just in case it is a new one to you, I will walk you through it and then you can give it a try too!


This card will be entered several places for challenges this week: "Anything Goes/Flowers" @ Artistic Inspirations Challenge, "#365 -Inspirational Photo" @ City Crafter Challenge Blog and @ Penny Black where "Anything Goes" for the month of June.


To start this card, I used an A2 size top folding horizontal card base in a rose red color. I trimmed 3 rectangles from white card stock, layered them evenly and temporarily adhered them together with repositionable sticky dots so that I could stamp them all at once. Using rose red dye ink and a stamp set from Close To My Heart, I repeatedly stamped the solid rose base image all over the 3 layers then added leaves in a sage green ink and the "Happy Anniversary" sentiment (retired from TAC) in black ink. (No need to worry about the white halo around the layers on the stamped images -that's the beauty of this design because they will be covered up in another step down the road.)


Before moving on to the next step. I tapped the newly stamped layers with the Perfect Crafting Pouch to quickly dry the inks so that the embossing powder in my next step would only stick to the Versamark ink. Using the 2nd step rose detail stamp, clear embossing ink and Silver Pearl embossing powder I added a second stamped and embossed layer to the 5 roses in the center of the card only. Once melted using the heat tool and cooled off, I wiped the Perfect Cleaning Cloth over it to remove any stray pieces of powder that may have been left behind.


The next step was to carefully remove the temp adhesive to separate the stamped layers and trim a red layer to back each one of them with a narrow border using my paper trimmer and the Best Glue Ever to hold each layer together as I built up the card front. 


 The Best Glue Ever also worked perfectly to adhere the red micro beads to the center of several of the flowers for added interest and dimension. The No Clog Writing Cap ensured that I had utmost control of where I wanted to apply the glue too.


While it's very hard to see in the photo, there is an added element of clear sparkle sprinkled over the card front because I splattered FSJ Sparkle Silk across it. It is subtle, but gorgeous in person!


The inside was kept super simple with just a retired TAC sentiment stamped in black ink. This card is now ready to be mailed out later this month to my brother-in-law and his wife.


Until next time, happy crafting with ScraPerfect~


Tuesday, June 6, 2017

Lime Your's

Today's card was made using sketch #335 from My Favorite Things as my inspiration and I'll be submitting it for "For the Guys" @ Unicorn Challenge Blog, "For a Special Man" @ Crafty Cardmakers and for "Dude" @ Shopping Our Stash. I made this for my hubby last week -just because I could, lol...no special occasion. Just celebrating our love and using one of my new stamp sets that I recently bought from FSJ during their "Break Up Sale".


This "Let's Twist" stamp set from Fun Stamper's Journey is a super cute one with fruity puns but sadly it is on the retiring list and I believe may now be sold out, so I am glad that I got it when I did! The square punch is an oldie from Creative Memories and the heart embossing folder was also from FSJ.


I trimmed all my white and lime cardstocks using the sketch as my guide. I then used the smaller of the 2 square punches on a lime scrap. After running the largest lime green piece thru the heart embossing folder, I sanded it with my sanding block and used the Perfect Cleaning Cloth to remove the residual dust.


Before adhering the heart embossed panel to the card front, I repeatedly stamped the half of a lime image in black ink along the card bottom to make my own patterned paper.


Then I stamped the lime slice 3 times across the white rectangle and colored it with Prismacolor watercolor pencils using the Dove Blender. The sentiments were stamped in Versamark ink and embossed with white powder on a darker shade of lime green cardstock. I also brushed clear Wink of Stella over the colored lime slices to give them a littler glimmer before gluing on 3 lime sequins.


Both sentiment banners were adhered using foam pop dots for added dimension and the Lime Your's square was rubbed around the edges with a bit of white ink first.


The inside is simple, with a bit of embossing on a scrap of the darker lime and white ink brushed across the surface. The inside sentiment is an old one from my stash and I have no idea where it is even from, after all these years, lol. A heart punch and a bit more sanding completed the look.


Until next time~


Sunday, June 4, 2017

Hello Birdie Birthday

Today's card was made using sketch #65 from Your Next Stamp and inspired by the "Winged Things" theme from The Artistic Stamper, the "F for Feathered Friends" theme from The Alphabet Challenge and the "Flowers and Friends make Life a Garden" quote challenge from the Time Out Challenge Blog


I started out with a birch A5 side folding card base and a piece of birch cardstock that I cut into a 4" circle using my Creative Memories circle cutting tools and templates.


The stamps I used are from A*Muse Studio (I think they were a past stamp of the month set from 2016) and the patterned paper was from an old Basic Grey Collection called Sweet Pea Alyssa.


The vintage bird was stamped in Tuxedo Black Momento ink and colored using water colors. Once that was dry, I used 2 shades of distress inks to give the edges of the circle a vintage photo look...but after I did it, I was wishing I hadn't, lol...oh well -it was clearly too late now. So I made the best of it and used some sky blue chalks to brighten up the sky a bit more.


The "hello" was die cut from both pink glitter paper and white fun foam to layer and add some dimension to the front of my card. Foam pop dots completed the look by popping up the bird circle just a tiny bit too. 


Final touches to the card front included clear sequins in 3 different sizes from Pretty Pink Posh and I even used my Gelly Roll Star Dust pen to add some glittery details to the middle of each flower blossom.


The inside of the card was stamped also in black ink, softly colored with chalks and I then tore the edge of a patterned paper scrap and glued it to the bottom right corner. This card is now finished and ready to mail to one of my aunt's later this year.


Until next time~


Thursday, June 1, 2017

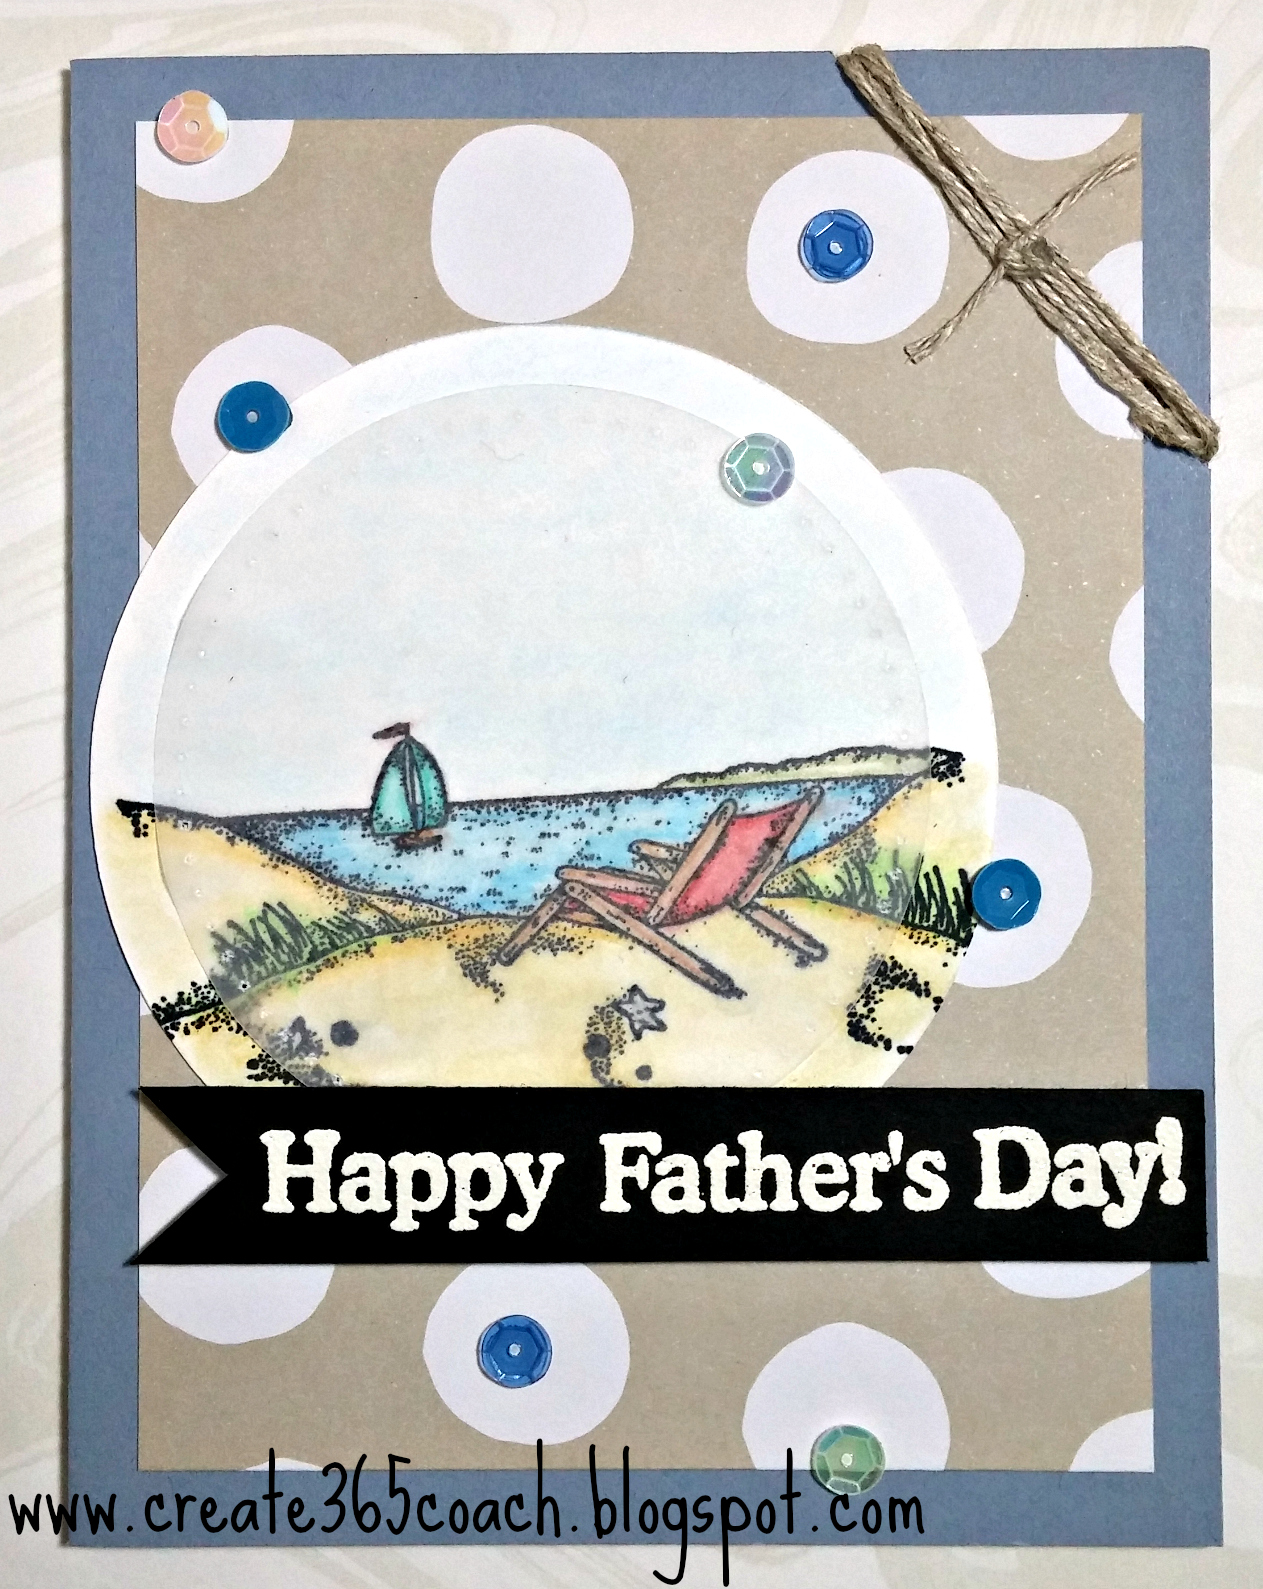
June MIUCB: Celebrating Father's Day Lakeside Style

Today's card is my 2nd Design Team post over @ the Mix It Up Challenge Blog where Anything Goes, but our optional challenge this month is to using Stamping. I also used the sketch from the Sugar Pea Designs Mix -It-Up Challenge #31.


 Using the sketch as my visual guide, I trimmed the tan polka-dotted cardstock so that the dusty blue, A2 side folding card base showed behind it and used my Creative Memories circle cutter to cut one circle from white cardstock and one from vellum for the card front. I then stamped the retired TAC Lakeside scene in Tuxedo Black Momento ink using my Stamp Perfect tool.


Once again, I colored the image with my Prismacolor Watercolor Pencils and the Dove Blender pen.


To make the black sentiment banner, I used a scrap of black cardstock that I first brushed lightly over with the ScraPerfect Perfect Crafting Pouch so that the white embossing powder would only stick to the Versamark ink and not the black cardstock. After heat embossing in white, I cleaned any remaining powder residue left from the Pouch with the Perfect Cleaning Cloth...not gonna lie, this step blows me away every single time. For years I had avoided embossing on dark cardstock because of all the complications involved but these two products from ScraPerfect have changed all that, lol!!!


Next I used my piercing tool to poke a border around the vellum circle before I adhered it over top of the stamped image...to do this and not have the glue show through, I sponged on a light layer of liquid glue and then smoothed it out as best as I could...although, it curled terribly in the process and you can still see some puckers. :(


 I hand cut a banner around the sentiment and adhered it to the card front with pop dots, used mini glue dots to adhere the sequins scattered across the front and notched the top right corner with a tiny hole punch and then tied it with some jute for added interest.


Inside, I used a patterned paper scrap and a retired sentiment also from TAC...this card is the one I will give to my hubby to celebrate Father's Day in a few weeks. He is the best dad my children could have ever asked for and I thank God every day that we get to enjoy our life's view together!


Until next time~